Controlling Flow with Registry
What if you wanted to modify the data flowing without stopping or restarting a Data Flow; do it “live”. We can use the registry to inject parameters into a data flow for use. Lets try it out.
Setting up Control
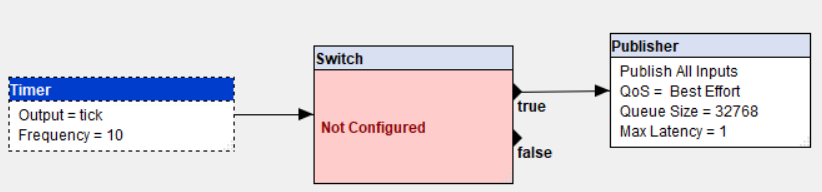
Lets start simple by publishing a timer tick. In between we add a Switch and we’ll connect to the True branch (aka the “If Label”).
Next, edit the Switch.
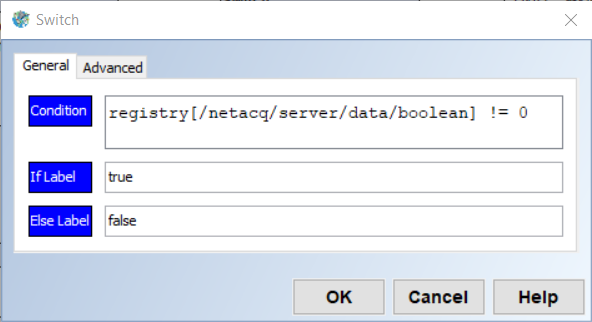
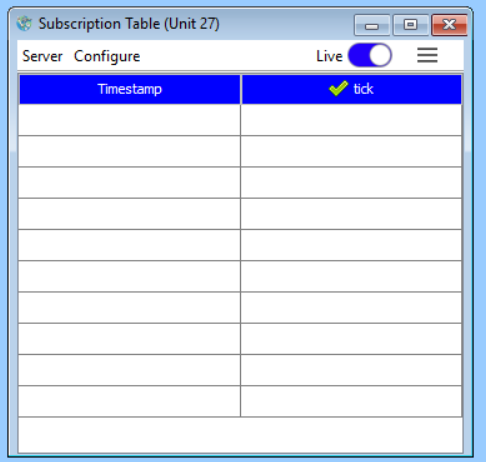
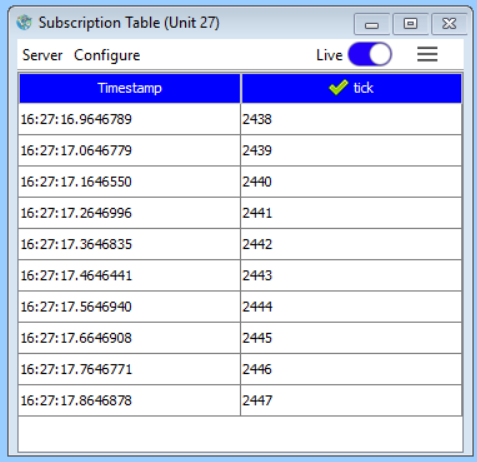
The registry directive reads a key, which I have populated in advance with the value 0. If I start this data flow and view the value in the MissionView Subscription Table, I can watch for changes. The key being zero evaluates to false, so the output of the switch travels down the false (aka “Else Label”) branch and our table is empty.
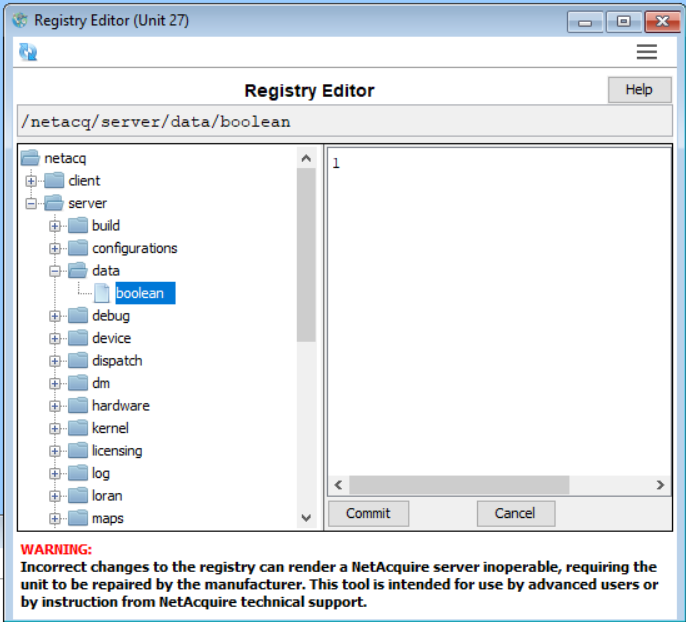
Now let’s use Registry Editor to change the key to 1.
After clicking Commit, the table sees values since data moves to the true branch.
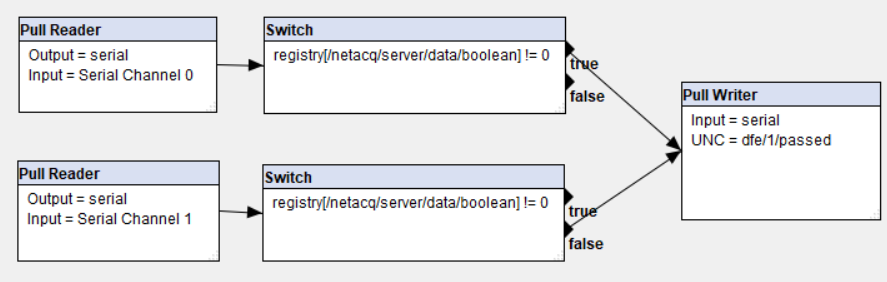
A more useful data flow might feature switches controlling readers. For instance, we could choose between two serial channels by using opposing switch branches. In this example the writer would receive channel 0 if the key is true, or channel 1 if false.
MissionView as Controller
If you have MissionView Designer, you can craft a user interface without programming. This example shows a simple 2-button setup where each button drives the registry key and uses a publication to set the enabled state of the button.

The supporting data flow.
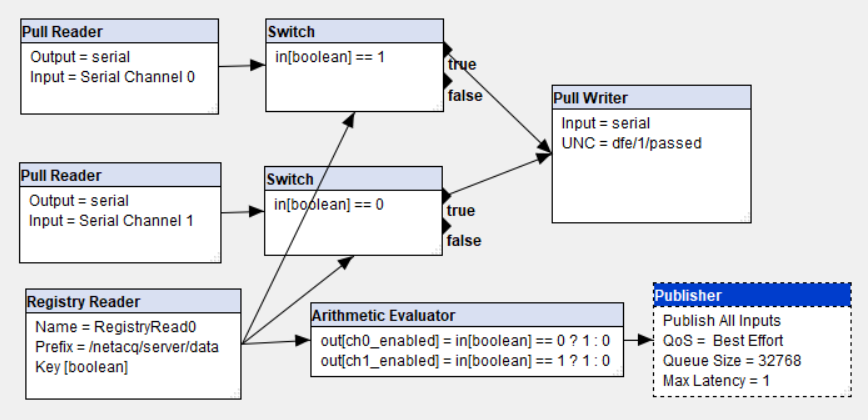
The key is now read by a separate Registry Reader and passed on to the switches, The Evaluator uses the key’s value to create two parameters that we publish:
- ch_0enabled, which indicates that
channel 0is selected - ch1_enabled, which indicates that
channel 1is selected
We’ll save how to configure the drawing (the button controls) for a MissionView article, but pressing the buttons will write the key to 1 or 0. And there you have it – a beginner’s controller. Highly complex UI’s can be crafted to manipulate data and dictate flow and calculations.